Wednesday, December 7, 2011

"Spritz" cookies, traditional and gluten-free

Spritzgebacken cookies

I have been baking Christmas cookies the past few days. Growing up, one of my favorite memories was coming home to the the aroma of freshly baked spritzgebacken cookies. My mother baked many varieties of cookies during the holidays, all beautifully decorated. 

My father is originally from Germany and he introduced us to a few traditional German recipes as well. One of my favorites was stollen. This distant cousin to fruitcake was labor intensive, requiring an enormous bowl, as well as a lot of vigorous kneading. We were only allowed to indulge in these once a year treats beginning on Christmas Eve, making them taste even more special.

Unfortunately, I can no longer enjoy these gluten filled goodies and this is especially difficult for me at this time of year. Nothing could beat a slice (or two) of stollen with a cup of coffee in the morning! 

I also love to bake during the Christmas season, but I only bake 3-4 of my favorite cookies. This recipe for "spritz" cookies is simple and delicious. I use a cookie gun to create different shapes. My sister, Karen, gave me the below adaptation for the best gluten-free spritz!

Spritzgebackens (traditional)

Preheat oven to 350 degrees
Use parchment paper on a cookie sheet

3/4 lb butter, room temperature
1 cup sugar
2 egg yolks
3 3/4 cup flour
1/4 teaspoon salt
1 T vanilla extract

Cream butter and sugar until light and fluffy.
Add the egg yolks, flour, salt and vanilla.
Mix thoroughly.
Bake 7-10 minutes until lightly browned.
Cool on wire rack.

Gluten Free Spritzgebackens

Preheat oven to 375 degrees.
Use parchment paper on cookie sheet.

1 3/4 cup white rice flour
1/4 cup sweet rice flour
1/4 cup potato starch
1/2 teaspoon xanthan gum
1/2 teaspoon salt

Whisk dry ingredients; set aside.
Combine butter, sugar, egg, vanilla.
Cream until fluffy.
Add dry ingredients. Mix.
Bake at 375 degrees until lightly golden brown.

Enjoy!


Wednesday, November 16, 2011

Lasagna Florentine

 The cross-country season at the kid's high school is coming to a close. To celebrate, we had  lunch at a local Italian restaurant. They had a buffet with pasta, salad, bread and desserts. (I decided not to risk eating the salad since in a restaurant where pizza is being made, flour is likely to be everywhere, and I was worried about cross-contamination.) I ate my lunch before leaving for the party and didn't really mind sitting there sipping a Starbucks until I spotted a long lost friend, LASAGNA!

Smothered with cheese, piping hot, the lasagna on the buffet smelled and looked delicious! I can't remember when I last ate lasagna. Until finding the brand Tinkanyada, cooking with gluten free pasta was always frustrating. The noodles would turn out chewy or too mushy. No one in my family would touch it.

I  really miss lasagna....especially the day after you bake it when it is at it's best.


 Before I knew how to cook well, I made lasagna a lot. The kids were small and it was convenient to make a one-dish meal while they were napping. I also liked serving it when I had company since I could make it a day ahead of time.

Seeing the lasagna at the restaurant inspired me to give it another try. I really didn't use a recipe, but went by the standard lasagna recipe you can find on the back of a package of lasagna noodles. I sauteed 1/2 lb of ground beef along with some chopped onion and added that to a jar of spaghetti sauce. I also added some chopped fresh spinach to the ricotta, egg, and parmesan cheese mixture both for color and nutritional value. I like the taste of fresh mozzerella and used it instead of the shredded variety.


As I have mentioned in earlier posts, my family is highly skeptical of any food I try and serve that has been modified to be gluten free. Texture is the big giveaway with pasta, so I was more than thrilled when my husband really liked this lasagna. He went back for seconds and also brought it to work for his lunch! My daughter, who is a vegetarian, did not eat it and my son is not a lasagna lover, so did not try it. That's okay! More for me!

Tuesday, November 1, 2011

Rosie's Perfect Pumpkin Bread (gluten-free, of course!)

Fall seems to have finally settled upon us with cooler temperatures and shorter days. I love all that comes with this time of year....the beautiful foliage, a crockpot full of hearty chili, and the aroma of pumpkin bread baking in the oven!

Elizabeth Barbone, author of Easy-Gluten Free Baking has a recipe for  gf pumpkin bread that rivals the traditional one made with wheat flour. The recipe makes 2 loaves, so freeze one to enjoy later.


Dry Ingredients:
 2 1/2 cups white rice flour
1/2 cup cornstarch
1 Tablespoon plus 2 teaspoons pumpkin pie spice
2 teaspoons baking soda
1 1/2 teaspoons salt
1 teaspoon xanthan gum

Wet Ingredients:
4 large eggs
1 cup vegetable oil
1/2 cup orange juice
3 cups granulated sugar
1  15 oz can pure pumpkin( not pumpkin pie filling)
1 cup dried cranberries( optional)

Directions:
1. Preheat oven to 350 degrees F. Grease and flour two 9x5 inch loaf pans.
2. In a large mixing bowl, whisk together dry ingredients. Set aside.
3. In a medium mixing bowl, mix together eggs, oil and orange juice. Add sugar and pumpkin. Blend until thoroughly combined.
4. Add pumpkin mixture to flour mixture. Stir until all ingredients are thoroughly combined. (Use medium speed on a handheld mixer or medium- low on stand mixer.) Scrape bowl down once or twice while mixing ingredients. Stir in dried cranberries, if using.
5. Pour batter into prepared loaf pans. Bake for 1 hour or until toothpick inserted into center of the loaf comes out clean.
6. Remove pans from oven and place on wire rack. Allow to cool in the pan for 10 minutes. Remove bread from pans and allow to cool completely on wire rack.

* I substitute fresh cranberries for dried and add approximately 1 cup. I also add 1/2 cup chopped walnuts.

Friday, October 7, 2011

So long, farewell....


Fall arrived exactly one day after summer said goodbye. In our home, I turned the air conditioning off and reluctantly switched the thermostat to HEAT! This inspired me to tackle the vegetable garden. It was looking very overgrown, and not in a good way. The morning glories were thriving, to say the least, but the tomato plants were tired and the zucchini plant gave up it's fight long ago against the stinkbugs.


After a long day of pulling out spent plants and cutting down vines, the garden plots looked clean and tidy. My husband hoed in some shredded paper to aerate the soil as well as compost to enrich it for next year.  I did leave one tomato plant, a jalapeno plant, and the Thai and regular basil. I am not quite ready to say goodbye to homemade pesto, so potted up a few basil plants to (hopefully) winter over in our garage. (Have you ever been in an Italian restaurant that has huge basil plants growing year round?)


It has been a few weeks since I have seen a hummingbird, so I also took down the feeders and cleaned them with hot water, mild soap and a splash of bleach. I soaked the feeders in my laundry room sink and after a few hours, the black mildew was gone. Sadly, I stored the feeders away until next spring. I am always a bit melancholy when I realize those little guys have migrated. (It is a myth that the hummingbirds will not migrate if the feeders are still up, and the stragglers will benefit from the feeders.)

I did put in 2 types of lettuce seeds hoping we will have some for our hungry guinea pigs before a hard frost.


For fall color, I planted yellow and purple pansies in my containers after discarding the annuals that had seen better days. Pansies do well in the cooler weather and will even make it through the winter! (I remember when I moved down here from the Northeast and could not believe pansies were growing in January!)

So yes, we bid the summer farewell....but say hello to pumpkin farms, apple cider, and cozy evenings by the fireplace!

Sunday, September 18, 2011

Fontaine Caffe and Creperie, Old Town Alexandria


My husband discovered this restaurant while searching the internet for gluten free dining options. (Isn't the internet wonderful?)  We do not eat out as often as we used to before I was diagnosed with celiac disease. Sometimes, it is awkward, to have to explain to a server what I can and cannot eat, so when we saw that this restaurant makes crepes, both gluten free and with wheat flour, we couldn't wait to try it. Or should I say, I couldn't wait to try it.

I grew up eating crepes for breakfast, "eirepfannkuchen", was a special treat in my family reserved for the occasional Sunday morning. My mother would stand at the stove, making one after the other, until all of us were stuffed! We would smear them with butter, and either syrup or sugar , roll them up and cut them into bite-size pieces. Oh, how I have missed them!

I was excited to make them for my husband when we were first married, but he never really liked the texture of the thin pancake, preferring the fluffier more traditional American version. So when I assured him that he would change his mind about crepes, after dining at this restaurant, he agreed, somewhat hesitantly.

The restaurant is tucked away on a quiet street in Old Town Alexandria VA. It has tables outside, but the inside is welcoming with a definite European feel. They offer both savory and sweet crepes, made with either wheat or gluten free buckwheat flour, with several choices of fillings.( buckwheat flour is gluten free despite the word wheat in the name) I ordered a savory crepe with spinach and feta cheese filling, my husband a ham, cheese and mushroom one. They all come with a generous side salad of fresh greens with a delicious dressing. I asked for a doggie bag for about half of mine as I wanted to save room for dessert. The sweet crepe I ordered for dessert was really the best thing I have eaten in a long time! It is called the Lemon Drop and it has a subtle lemony sweet filling and is dusted with confectionary sugar. I truly could taste no difference in these crepes made with the buckwheat flour, and they reminded me of the German ones my mother used to make.

Give this place a try next time you are in Old Town...you will not be disappointed!


Wednesday, September 14, 2011

Is there a Vegetarian in your house?

Luau Pig
My daughter has talked about and tentatively gone vegetarian on and off for a few years. She is a natural born animal whisperer and hopes to be a veterinarian. Our neighborhood luau sealed the deal for her. The sight of a pig with an apple in his mouth on the buffet table was too much for her. This time, I think she may never go back to eating meat. It has been over a month and nary a morsel of bacon, chicken or beef has grazed her lips (excuse the pun!)

I have been supportive of her decision and have read a few vegetarian cookbooks. Luckily, she is not a picky eater, loves fruits and vegetables and will still eat fish. I did make one or two recipes chock full of legumes and vegetables but it was lacking in flavor. This recipe below appealed to everyone in the family and can be made with either corn (gluten free) or flour tortillas.

It is super easy. My daughter made these herself with only a small amount of help from me.


Four Bean Enchiladas


Ingredients:


16  6-inch corn tortillas
1  15 oz can red kidney beans, rinsed and drained
1  15 oz can garbanzo beans, rinsed and drained
1  15 oz can pinto beans, rinsed and drained
1  15 oz can navy or great northern beans, rinsed and drained
1  11 oz can condensed cheddar cheese or nacho cheese soup
1  10 oz can enchilada sauce
1  8 oz can tomato sauce
1  1/2 cups shredded Monterey Jack or cheddar cheese ( 6 ounces) 
 Sliced pitted ripe olives( optional)
 Chopped green pepper ( optional)


Directions:


  • Stack tortillas and wrap tightly in foil. Bake in 350 degree oven for 10 minutes or till warm.
  • For filling, combine beans and cheese soup. Spoon about 1/3 cups filling onto one end of each tortilla. Arrange, seam side down, in 8 individual au gratin dishes or two 2 quart rectangular baking dishes.
  • In a bowl, stir together the enchilada sauce and tomato sauce; pour over tortillas. Cover with foil . Bake in a 350 degree oven for 30 minutes or till heated through.( 20 minutes if using au gratin dishes) Remove foil; sprinkle with cheese. Bake, uncovered, about 5 minutes more or till cheese melts. If desired, sprinkle with olives and green pepper. Makes 8 servings.


Note- check the ingredients on the soup, as the popular brands are not gluten free.

Wednesday, August 31, 2011

Bubba Deen's Shrimp Etouffee


I like a lot of Paula Deen's recipes. They are not super complicated and the ingredients are easy to find in the grocery store. And they taste great. One day when watching her show, she featured her brother, Bubba. The two of them made this dish together.

 This recipe for shrimp etouffee sounds fancy....etouffee, but it is really simple to make. It tastes so good, has just the right combination of flavors as well as a creamy texture. I worked for a few months in New Orleans as a travelling nurse and this dish reminds me of the unbelievably good food I ate while there.

Ingredients:
1/2 cup oil
1/2 cup flour (I use Bob's gluten-free all purpose flour)
1 cup chopped yellow onion
1/2 cup chopped green pepper
1 cup chopped celery
3 cloves garlic, finely minced
1/2 teas. black pepper
1/2 teas. white pepper
1/2 teas. cayenne pepper
1 teas. Cajun seasoning
1/2 cup minced green onions, plus extra for garnish
1/2 cup minced fresh parsley leaves
2-3 dashes hot sauce
1 (8oz) clam juice
1 (4.5 oz) can diced tomatoes
salt 
2 pounds small or medium shrimp peeled and deveined (31/35 count)
1/2 stick butter
Rice (optional)
Diced green onions(for garnish)


Directions:


Make the roux, mix oil and flour in a large heavy saucepan over low heat. Whisk flour into the oil to make a paste. Continue cooking over low heat and whisk continuously, until the mixture turns a caramel color and gives off a nutty aroma, about 15-20 minutes. To the roux, add the onion, green pepper, celery, and garlic and cook over low heat, about 5 minutes, until the vegetables are limp. Add the black pepper, white pepper, cayenne pepper, Cajun seasoning, green onions, parsley and hot sauce to taste. Add 1 can clam juice and the tomatoes with their juice, stir to blend. Add the salt, starting with 1 teas., then add more if needed. Bring the mixture to a boil, reduce the heat to low and simmer 10-15 minutes. Add shrimp and stir. It will take about 3 minutes for the shrimp to cook, don't overcook. Remove from heat. Add the butter and stir, the heat from the dish will melt the butter. Transfer the etouffee to a tureen, serving bowl , or if you prefer, over rice. Garnish with the green onions. 


Tip: I add 1 jalapeno pepper, diced and omit the hot sauce. It is plenty spicy!

Tuesday, August 23, 2011

Wine Slushies~ Straw or Spoon?


Brace yourself. This drink is awesome. It will be your new "go to" adult beverage.
And, it is simple to make, but you do have to wait for it to freeze. That is really the hardest part of this recipe.

I googled wine slushies when my friend, Judi, told me about how good they were. There seemed to be a few ways to make them, some as easy as buying a pre-made mix and some more time consuming, making a simple syrup etc.

I found this very easy recipe from the Chatham Hill Winery website. They have several recipes but I chose this one made with white wine since we were having fish. I mixed a pitcher up in my blender the night before, placed it in the freezer overnight and it was perfect the next morning! Serve in a margarita or martini glass. Straw or spoon, your choice!

Frozen Wine Slush
"Zingy"


1 bottle Pinot Grigio or Riesling
1 can frozen limeade
1 cup cranberry juice


Add wine, fruit juice, or fresh fruit to blender and blend until smooth, and freeze. The alcohol will prevent the mixture from becoming solid ice. 


Tip:
Our standard size blender could not hold the full bottle of wine, so I made the slushies in 2 separate batches.

Monday, August 22, 2011

Sweet Surprise


A few weeks ago, I noticed what I thought was a cucumber vine growing from the compost bin. I weed whacked carefully around it, not wanting to disturb this mysterious plant. Last year, we had our juiciest tomatoes from a plant that grew out of the compost bin.


So when my husband identified this vine as a cantaloupe, and I discovered many melons hiding and slowly ripening under the leaves, I was shocked! This compost bin soil is pure magic! I mean, for one, it has all the right nutrients for a growing plant, plus it is protected from rabbits, birds, rodents as well as overzealous gardeners who may mistake the seedling for a weed.

So, I am happily watching and waiting for these wonderful melons to ripen enough to pick. Yes, I have picked many tomatoes, peppers, zucchini and lettuce this summer, but this find seems like a freebie. You know, like finding a dollar bill on the ground....

What garden surprises have you found this summer?


Wednesday, August 17, 2011

Spanish-style tortilla with salami and potatoes

Add caption
This recipe would work well for brunch or for dinner. I found it in the September 2011 issue of Women's Day magazine. I like the idea of it all cooking in a cast iron skillet.

 I was skeptical about the salami, but it really went well with the other ingredients. I guess you could also use pepperoni or make it meatless.

This was a filling and delicious meal. A green salad would go nicely with this recipe.

Ingredients:

1/4 lb. thinly sliced salami, halved
1 large onion, chopped
3/4 lb. medium red potatoes, about 2, cut in 1/2 inch pieces
3 T olive oil
kosher salt and black pepper
1/4 cup fresh, flat-leaf parsley, roughly chopped
8 large eggs
4 oz. sharp white cheddar, grated ( about 1 cup)

Directions:

  • Heat oven to 400 degrees.
  • Cook salami in a large oven-safe non-stick skillet over medium high heat until beginning to brown, about 1 minute per side. Transfer to plate.
  • Add the onions, potatoes, 1 T olive oil, 1/2 tsp salt, 1/4 tsp pepper to the skillet and cook, stirring occasionally, until potatoes are golden brown and just tender, 10-12 minutes; stir in chopped parsley and salami.
  • Whisk together the eggs and cheese, pour into the skillet and stir to distribute the ingredients.
  • Transfer to skillet to the oven and bake until tortilla is puffed, brown around the edges and a knife inserted in center comes out clean, 10-12 minutes.


Saturday, August 13, 2011

Summertime Comfort Food~Shrimp Salad

Shrimp Salad

This recipe goes over well with my family. It can be spread on sandwiches, stuffed in tomatoes, or just eaten as is. To me it is the perfect summer "comfort food"!


Ingredients:

1/2 lb cooked small- medium sized shrimp
1 celery stalk, chopped finely
2 scallions, diced
small amount chopped green pepper
1/2 package Old Bay Seasoning
1/3 cup mayo (add more if needed)
3-4 fresh basil leaves, cut
fresh ground pepper to taste


Directions:


Combine all ingredients except shrimp and basil and mix well.
Add shrimp and toss.
Add fresh basil and chill for a few hours in fridge.


Tip:


I bought raw shrimp, seasoned them with salt and pepper and garlic powder. 
I sauteed them in butter/oil in skillet until cooked.
After they cooled, I peeled and deveined them,  and cut them in thirds, since mine were large shrimp.


shrimp after cooking


Saturday, August 6, 2011

Baked Prosciutto and Egg Cups by Rachel Ray

Baked Prosciutto and Egg Cups

I saw this recipe in the September 2011 issue of  Rachel Ray's Everyday magazine and thought it would be fun to make.
My kids and I made it together yesterday for a late breakfast. They had just returned from cross-country practice and were starving! I did not have any prosciutto so substituted slices of ham instead.

before hitting the oven

Ingredients:


6 thin slices prosciutto
2 oz. fresh mozzerella, cheese torn into small pieces
3 large basil leaves, torn
6 eggs
freshly ground pepper


Directions:


Coat 6 cups of muffin tin with cooking spray.
Fit each cup with a prosciutto slice.
Divide half the cheese and basil among cups.
Crack an egg into each and nestle remaining mozzerella and basil around eggs.
Bake at 350 until set, about 15 minutes: let rest for 5 minutes.
Season with salt and pepper.
Run knife around cups to unmold.
Serves 6.

Friday, August 5, 2011

Random photos of our backyard birds


female hummer having her breakfast
The weather this morning was reminiscent of fall. Warm and sunny, with cool breezes. There was plenty of activity at the feeders and I sat memorized with my camera for far too long....just when I convinced myself to get up and tackle some housework, another bird would fly into my view.....

At one point, I was standing next to the hummingbird feeder, but the courageous creature ignored me, maintaining her focus on other hummers. I could have reached out and touched her.


A female cardinal spent a few minutes bathing in the pond waterfall. She watched me and our cat, Morris, but didn't seem too worried.


I have seen a lot of goldfinches recently, snacking on the purple coneflower seeds in the front yard. This pair seemed happy to stop by the feeder this morning.

Wednesday, August 3, 2011

Guinea Pigs 101

Linus and Snoopy

We have our share of animals in this family. We have 2 dogs, 2 cats, tropical fish, a koi pond, an elderly hamster, so of course, when my daughter begged for guinea pigs, I said "no"!

For months, and she might say, years.....


I did not grow up with guinea pigs. We had a hamster named Bruno, 4 cats, a dog and various wild squirrels and birds my mother would hand-feed with a medicine dropper. My father even built a small cage because we had so many orphaned wild animals. I'll never forget one squirrel that my mother reared that became so strong it went careening through our living room one day! My mother was more than ready to release it back to our yard!

But back to the pigs....you see, my daughter LOVES animals! It has always been her passion and she has never waivered in her dream to become a veterinarian.. She has wanted guinea pigs since she was in 3rd grade, spent hours researching, checked out the same books on them from the library and talked endlessly about their care and feeding to me.

Eventually, she presented me with a 40 page paper explaining her desire to rescue a pair.("You cannot just keep one..that would be cruel, Mom, I would rather not have any...they are social animals!")

She broke me down, and I finally agreed to let her have them. I must admit that these chubby little squeakers make great pets! They sleep at night and are awake during the day, love people and the occasional dachshund! Believe it or not, they can be potty-trained and be taught tricks!

Oliver and Snoopy

An interview with my daughter about guinea pigs.


Q: Why did you want to have guinea pigs for pets?
A.  I wanted my own pets, that I would be responsible for. I love having them in my own room.

Q. You have had hamsters, why are guinea pigs different?
A. Hamsters are nocturnal , guinea pigs are diurnal, like us, bigger and they interact more...they adjust to your schedule and actually make squeaking noises when being fed.

Q. Speaking of food, what do they eat?
A. Guinea pigs eat pellets, hay, fresh fruit and vegetables.

Q. Are they good with young children?
A. Yes, but they need to be supervised and handled gently.

Q. Is is okay to have just one?
A. No, since guinea pigs are herd animals and really would be lonely without a companion, it is best to have at least 2 of the same sex.

Q. What does "popcorning" mean?
A. Guinea pigs jump and twist when they are happy and excited, like when I rustle the hay bag just before I feed them!

Q. How long do they normally live?
A. 7-9 years, but some will live into their teens.

Q. What type of cage should they be housed in?
A. Even though they sell guinea pig cages in the pet store, I recommend a C & C cage. This type of cage is made up of storage cube grids that you can buy at Bed , Bath and Beyond. These types of cages provide a larger area for them as well as flexibility.

Q. How much work is it for you to take care of them everyday?
A. I spend roughly an hour everyday. I clean their cage daily and cut up fresh veggies and fruit twice a day. Luckily, I am able to get their lettuce from my mother's garden. Now that they are potty-trained, cleaning up after them is much faster.

Q. Can you recommend some internet sites with more information?
A. Yes, these 2 sites were very helpful when I was researching them!

.http://www.cavyspirit.com/sociallife.

htmhttp://www.guineapigcages.com/

Linus and Snoopy enjoying swiss chard


Sunday, July 31, 2011

Taco Salad

Taco Salad

It has been extremely hot and humid the past few days....last night around 10pm it was still over 90!
I hate to turn the oven on when making dinner during this heatwave so I try to make recipes that can go in the crock pot or can be cooked on the stove top.

Or, I make a big salad. (That reminds me of the Seinfeld episode where Elaine always orders the "big salad" at the local diner).

I love a lot of the recipes from the New Better Homes and Garden Cookbook. This recipe is one of my favorites from the book.

Ingredients:


8 oz ground beef
3 cloves garlic, minced
15 oz. can dark red kidney beans (rinsed and drained)
8 oz jar taco sauce
3/4 cup frozen whole kernel corn, thawed
6 cups shredded leaf, and/or iceberg lettuce
2 medium tomatoes, chopped
1 large green pepper, chopped
1 jalapeno pepper, diced
1/2 cup thinly sliced green onions
1 medium avocado, pitted, peeled and chopped
3/4 cup shredded sharp cheddar cheese
tortilla chips
sour cream


Directions:


In a medium saucepan, cook ground beef and garlic until brown . 
Drain off fat.
Stir in kidney beans, taco sauce, and corn.
Bring to a boil.
Reduce heat.
Simmer, covered for 10 minutes.
Meanwhile, in large bowl, combine lettuce, tomatoes, peppers, and green onions.
Toss gently and serve with meat mixture.
Top with avocado, shredded cheese, and sour cream if desire.
Serve with tortilla chips.

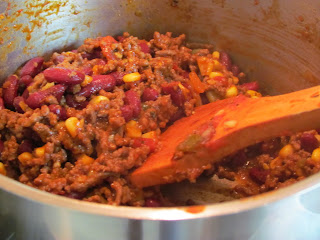
Meat mixture


Salad


I hope you enjoy this recipe as much as my family does! What are your favorite recipes you like to serve on a hot summer day?

Sunday, July 24, 2011

Peach and Blueberry Crumbles

Peach and Blueberry Crumbles
Is there anything better than produce in the middle of summer? I am overwhelmed with the selection at the grocery store and farmer's market this time of year! I end up buying too many containers of fresh blueberries, and I can never keep up with all the ripening peaches.

 I decided to bake with the peaches and blueberries. I love the combination of taste, texture and color. Before I had to eat gluten free, I loved baking peach pies in the summer. But, let's face it, making pie crust is no easy task and making the gluten free crusts is a bit more time consuming. 


I found a really easy and delicious recipe from Ina Garten calledPeach and Blueberry Crumbles. I used a gluten free flour mix I had made up a few months ago and it worked well with this. This recipe recommends using ramekins or custard cups, but I baked it in a 9 in deep dish pie plate. Next time I would use the ramekins as it was a bit soupy.


All my gluten eating family members gobbled this down, except for my fussy teenage son, who also happens to be allergic to peaches. 


Ingredients


For the fruit:

  • 2 pounds firm, ripe peaches (6 to 8 peaches)
  • 2 teaspoons grated lemon zest
  • 2 tablespoons freshly squeezed lemon juice
  • 1/2 cup granulated sugar
  • 1/4 cup all-purpose flour
  • 1 cup fresh blueberries (1/2 pint)

For the crumble:

  • 1 cup all-purpose flour
  • 1/3 cup granulated sugar
  • 1/4 cup light brown sugar, lightly packed
  • 1/2 teaspoon kosher salt
  • 1/4 teaspoon ground cinnamon
  • 1/4 pound (1 stick) cold unsalted butter, diced

Directions

Preheat the oven to 350 degrees F.
Immerse the peaches in boiling water for 30 seconds to 1 minute, until their skins peel off easily. Place them immediately in cold water. Peel the peaches, slice them into thick wedges, and place them in a large bowl. Add the lemon zest, lemon juice, granulated sugar, and flour. Toss well. Gently mix in the blueberries. Allow the mixture to sit for 5 minutes. Spoon the mixture into ramekins or custard cups.
For the topping, combine the flour, granulated sugar, brown sugar, salt, cinnamon, and the butter in the bowl of an electric mixer fitted with a paddle attachment. Mix on low speed until the butter is the size of peas. Rub the mixture with your fingertips until it's in big crumbles, then sprinkle evenly over the fruit. Place the ramekins on a sheet pan lined with parchment paper and bake for 40 to 45 minutes, until the tops are browned and crisp and the juices are bubbly. Serve warm or at room temperature.
If you want to make these early, store the unbaked crumbles in the refrigerator and bake before dinner

Thursday, July 21, 2011

Roasting Vegetables

Roasted Brussel Sprouts


 I grew up eating very healthy meals prepared by my mother. She made 3 meals for everyone everyday that included many fruits and vegetables. I credit her for my knowledge of how to raise my children to eat healthy.

But, my mother never seasoned her food or fed us anything other than boiled vegetables. I grew up hating peas since they were canned and tasted completely different than fresh or frozen peas.

Roasting vegetables in something I learned from watching Ina Garten, The Barefoot Contessa, on the Food Network.  I love the simplicity of the way she cooks, using fresh ingredients with amazing results. Roasting improves the flavor of vegetables and is incredibly easy to do. It brings out the sweetness in them as well as gives them a crispy texture. This is especially important when trying to increase our daily amount of vegetables. Some of my family's favorites are roasted cauliflower, potatoes and brussel sprouts.


Ina Garten's recipe for Roasted Brussel Sprouts


Ingredients

  • 1 1/2 pounds Brussels sprouts
  • 3 tablespoons good olive oil
  • 3/4 teaspoon kosher salt
  • 1/2 teaspoon freshly ground black pepper

Directions

Preheat oven to 400 degrees F.
Cut off the brown ends of the Brussels sprouts and pull off any yellow outer leaves. Mix them in a bowl with the olive oil, salt and pepper. Pour them on a sheet pan and roast for 35 to 40 minutes, until crisp on the outside and tender on the inside. Shake the pan from time to time to brown the sprouts evenly. Sprinkle with more kosher salt ( I like these salty like French fries), and serve immediately

http://www.foodnetwork.com/recipes/ina-garten/roasted-brussels-sprouts-recipe2/index.html

Try them! It will change the way you eat vegetables!

Monday, July 18, 2011

Dog Days of Summer

Oliver!
It is officially the dog days of summer and the weather is brutally hot and humid. Our dogs are doing a good job keeping our rabbit population under control, much to the horror of our animal lover daughter.

Tomato vine
 We have been lucky it has  stormed every few days to help out with the daily watering chore. Our vegetable garden is growing, and growing and growing! The solo zucchini plant is huge and producing more squash than I can cook or bake with, the tomatoes are ripening nicely and the guinea pigs eat fresh lettuce everyday! We also have a cucumber vine growing from the bottom of the compost bin!

cucumber vine

morning glory
The morning glory seeds I planted to disguise the wooden posts have climbed up those posts as well as any available tomato plant nearby! I cut back those eager vines daily before they choke out every plant in the garden.  Our crepe myrtle tree is blooming and it's arch providing a beautiful floral entry to our garden.


our "secret garden"

Check out the brown-eyed susans ! They are in full flower and are attracting hummingbirds as well as bees. They are ridiculously easy to grow and thrive in the hottest, driest conditions.


brown-eyed susans

I couldn't resist sneaking in a photo of this hummingbird perched comfortably on the feeder. We have about 3 or4 hummers around everyday. They swoop and fly backwards and forwards staking a claim on the feeders. I rarely see them feeding at the same feeder simultaneously.

female hummingbird


Friday, July 8, 2011

Thai Green Curry Chicken

Thai Green Curry Chicken
I really love Thai food and before having to go gluten free, loved eating out at Thai restaurants. The food is seasoned well using  fresh ingredients. So I decided to try some of the recipes, especially after learning to cook with my wok. Like with most stir-fry recipes, much of the work is in the prepping. The actual cooking time is quick and the resulting meal, well worth it!


packaged lemon grass from Safeway and Lemongrass stalks from Shoppers Food Warehouse

This recipe caught my eye since I was curious about using fresh lemongrass . I had heard of it, seen the stalks in the produce section in the grocery store, and my husband is growing it this year!

our lemongrass plant

I like that this recipe calls for zucchini, since we have a lot in our garden now. I have made curries before but always used the jarred green or red curry paste sold in the grocery store Asian section. This time I made my own and what a difference! Once the curry paste is made, the remainder of this recipe is quick and easy!

green curry paste ingredients in food processor


green curry paste after processing


Thai Green Curry Chicken


Green Curry Paste
  • 4 small green Thai chilis, OR 1 -2 jalapeno peppers
  • 1/4 cups shallot or purple onion, diced
  • 4 cloves garlic, minced
  • 1  thumb-sized piece galangal or ginger, grated
  • 1 stalk fresh minced lemongrass, or 3 T frozen or bottled prepared lemongrass
  • 1/2 tsp ground coriander
  • 1/2 tsp ground cumin
  • 3/4 to 1 tsp shrimp paste
  • 1 (loose) cup fresh cilantro leaves, chopped
  • 1/2 tsp ground white pepper
  • 3 T fish sauce
  • 1 tsp. brown sugar
  • 2 T lime juice
Curry Ingredients:
  • 1 to 1.5 lbs. boneless chicken thigh or breast, cut into chunks
  • 1 can coconut milk
  •  1 tsp. grated lime zest
  • 1 red bell pepper, seeded and cut into chunks
  • 1 zucchini, sliced lengthwise several times and cut into chunks
  • Generous handful fresh basil
  • 2 T peanut or vegetable oil
Preparation:

1. Place all green curry paste ingredients together in food processor and process into a paste. If necessary, add a few Tbsp. of coconut milk to help blend ingredients. Set aside.
2. Warm a wok or large frying pan over medium-high heat. Add the oil and swirl around, then add the green curry paste.
3. Stir-fry briefly to release the fragrance ( 30 seconds to 1 minute), then add 3/4 of coconut milk.
4. Add the chicken, stirring to incorporate. When the curry sauce comes to full boil, reduce heat to medium, and simmer.
5. Cover and allow to simmer 3-5 more minutes, or until chicken is cooked through. Stir occasionally.
6. Add the red bell pepper and zucchini, plus the lime zest, stirring well to incorporate. Simmer another 2-3 minutes, or until vegetables are softened but still firm and colorful.